One Wreath, Every Season: My Valentine’s Day Door Decor DIY
- Feb 7
- 3 min read
Ok so this was not the plan… but I turned my old football wreath into a Valentine’s Day wreath and I’m kind of obsessed.

One day I was wandering through the sale section at Michael’s (because where else do we all end up), and I found myself digging through their flower area. Mixed in with all the random seasonal stuff were these little picks — a pink flamingo, a “Happy Fall” sign, and a few small flower bundles.
Everything was under $2… and I instantly thought, wait a second… why am I buying a whole new wreath every season when I could just make one wreath that I can change all year long?
And honestly, it was perfect timing. I had just sold my townhouse, donated more crafts and home decor than I care to admit, and moved into a small apartment where storage space is basically nonexistent. But, decorating for the holidays? Still a must. Always.
So I grabbed a cheap 18” grapevine wreath, and just like that… my DIY wreath plan was officially hatched.
From that point on, every time I was in Dollar Tree, Hobby Lobby, or anywhere with seasonal decor, I started keeping an eye out for small themed pieces I could use to transform my new little friend. And honestly? It became kind of addictive.
What You’ll Need
Here’s what I used to create my “one wreath every season” setup:
18” grapevine wreath (or twig wreath)
Seasonal picks / decor pieces (Dollar Tree, Hobby Lobby, Michaels)
Ribbon (optional but always cute)
Floral wire or pipe cleaners
Hot glue gun + glue sticks
Wire cutters (or scissors that you don’t care about ruining)
How I Turn One Wreath Into Every Season (Step-by-Step)
Step 1: Start with a simple wreath base
I started with a basic 18” grapevine wreath. Nothing fancy. This is the foundation that stays the same all year long, and it’s perfect because it already looks natural and cute on its own.
Step 2: Collect seasonal picks as you find them
This is the fun part. I didn’t buy everything at once — I slowly collected little themed pieces over time. Anytime I saw something cute in the sale section at Michael’s, Dollar Tree, or Hobby Lobby, I’d grab it.
A flamingo? Yes.A “Happy Fall” sign? Absolutely.Tiny flowers for spring? Throw them in the cart. 😅
Most of the pieces were under $2, which is why this idea is so budget-friendly.
Step 3: Keep it simple — don’t overcrowd it
The secret to making it look expensive (even when it’s not) is not cramming too much onto the wreath. I usually pick:
1 “main” statement piece
a few accent flowers or greenery
and maybe a ribbon if I’m feeling fancy
Less is more… even though I have to talk myself out of buying 47 extra things every time.
Step 4: Attach everything so it’s easy to change later
I like to attach my pieces using floral wire or pipe cleaners, because it makes it so easy to swap things out when the season changes.
Hot glue works too, but wire is the real MVP if you want to reuse your wreath all year.
Step 5: Fluff it and step back before you commit
Once everything is attached, I always hang it up and step back to look at it from across the room.
Because what looks cute on your kitchen counter… sometimes looks like a craft explosion once it’s on the door.
Step 6: Swap it out when the season changes
This is what makes this whole idea genius (if I do say so myself).
When the holiday is over, I just:
snip the wire
remove the old pieces
store them in a small bin
and swap in the new season decor
Same wreath… brand new look.
How I Made It Valentine’s Day Ready
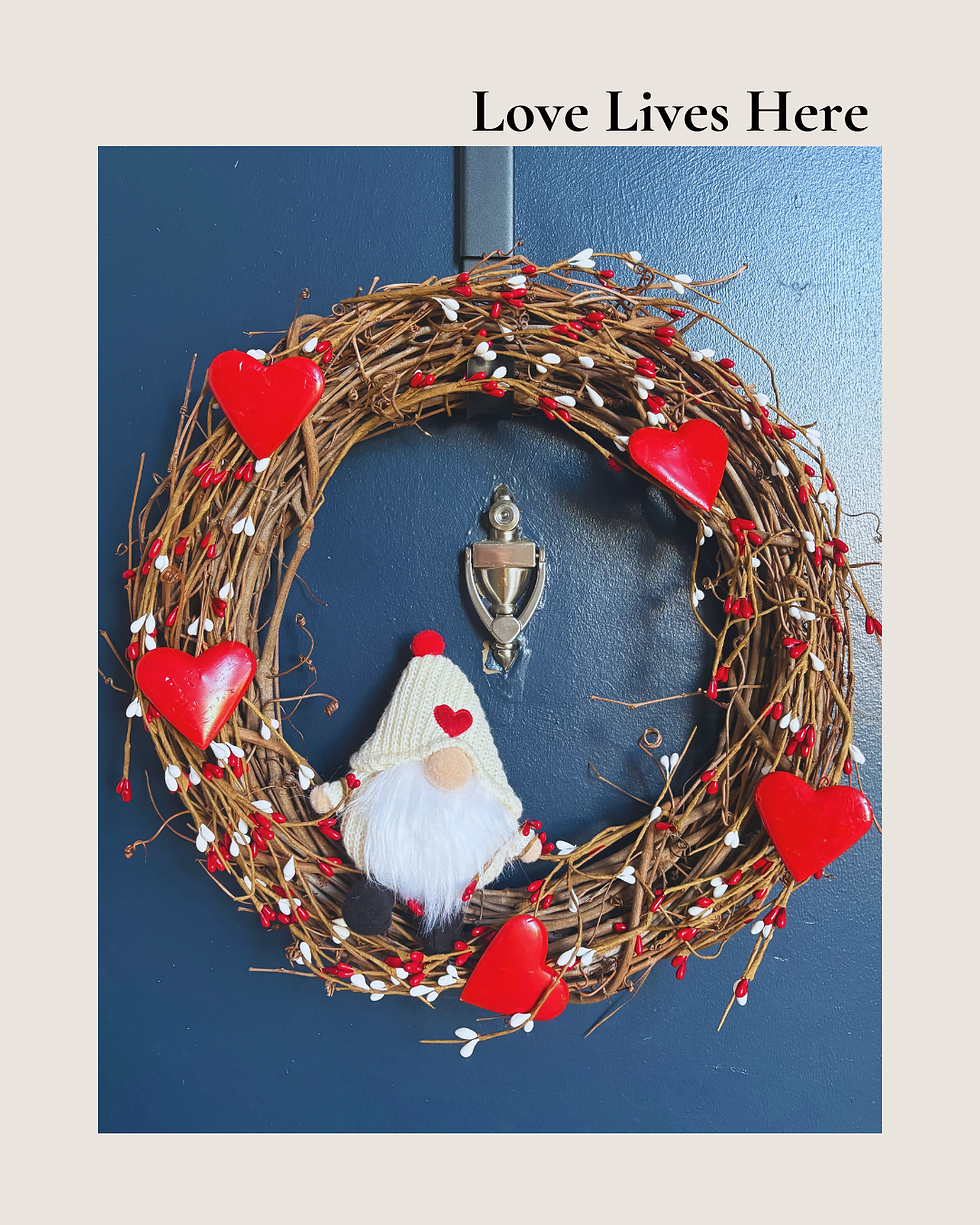
For the Valentine version, I kept it simple and used:
The garland I used came from Hobby Lobby (and yes… it was 40% off because I refuse to pay full price).
It was basically made up of a bunch of little floral picks attached to a long garland base, and each piece had its own little metal wire wrapped around it to hold it in place.
So instead of hanging the garland somewhere, I dismantled it. I literally just unwound each pick one by one (super easy), and suddenly I had a whole pile of Valentine floral pieces ready to use.
Then, I took those picks and just stuck them right into my twig wreath… and used the same metal wire from the garland to wrap around the wreath and secure everything.
No glue. No complicated steps. No stress.
After that, I added a small Valentine gnome (because obviously), attached him with a little floral wire…
and BAM. That’s it.
Cheap, easy, and looks like I spent way more than I did.


Comments